
This Magento 2 extension adds full gift card support to your store. Yep, your customers will finally be able to buy and redeem gift cards without drama — whether it’s a well-deserved self-gift or a quick way to not show up empty-handed at a birthday.
It’s built to work smoothly for both the buyer and the poor admin who has to manage it all.
Since not all businesses (or bosses) are created equal, you can configure card values, expiration, and other handy stuff to make it fit your store. This guide walks you through installing, setting up, and using the extension — without losing your sanity. Or at least no more than usual with Magento.
✨ Features (aka why this thing is actually useful)
- 🛠️ Create gift card products right from the admin panel — no code, no sweat.
- 🧾 Full gift card code management: create, edit, check balances, and see what users have done with them (they get creative).
- 💰 Let customers choose the amount from a dropdown — you define the values, so no weird €2.73 cards.
- 📩 Option to send the gift card to a friend with name, email, and a custom message (social points unlocked).
- 🌍 Multi-store and multi-currency support, in case you like to make your life harder (or just sell internationally).
- 🛒 Cart page integration — works just like a coupon code.
- ✅ Checkout page integration too — for all those who forget until the last second.
- ✉️ Customizable email templates so your gift cards don’t look like a 2005 bot wrote them.
⚙️ Installation (aka “make it work”)
You can find it on Magento Marketplace: Free Giftcard Extension for Magento
Or skip the fluff and go full CLI ninja:
composer require bydn/giftcard
./bin/magento module:enable Bydn_Giftcard
./bin/magento setup:upgrade
Done. If everything worked, the module is now active in your backend. If it didn’t… well, welcome to Magento 😅
🧩 Configuration (yes, the tab hell begins)
Navigate to:
Stores => Configuration => Sales => Gift cards (by DN).There are four config sections. Let’s break them down:
🧩 General
- Enable: Turn the extension on or off. No gift cards? No problem.
- Default Amounts: Define the default gift card values (like 10, 20, 50…). You can override them per product later.
- Send by email: If enabled, customers can send the card to someone else. If not, it goes to the buyer.
- Email Sender: Choose the identity used for sending.
- Email Template: Pick your template — and yes, you should customize it.
💡 Tip: Go to Marketing => Email Templates to edit it properly.
⏳ Expiration
- Single use: If enabled, the gift card can only be used once — even if there’s leftover balance.
- Enable expiration: Activate card expiry.
- Expiration time (days): Set how long the card lives before it goes to gift card heaven.
💸 Discounts
Block discounts on gift card products: Prevents customers from buying gift cards at a discount. Because no, we’re not doing 2-for-1 gift cards.
Block gift card purchases using other gift cards: Prevents recursion of doom (and discounts).
🎨 Creating a Gift Card (spoiler: it’s easy)
Creating a gift card product is just like adding any other product. Well, mostly.
Go to:
Catalog => ProductsThen click “Add Product” and select “Gift Card”.
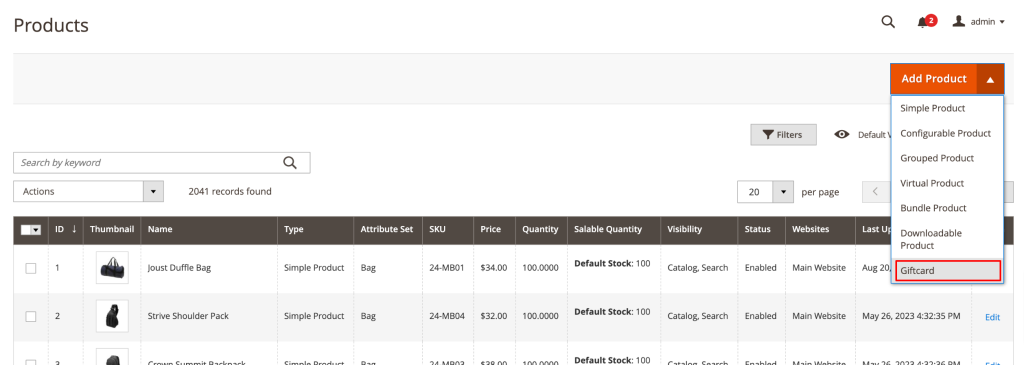
Now fill out the usual stuff: name, attribute set, SKU, stock, categories, description… the boring bits.
Important: set the price to 0
Why zero?
Because the actual price will be chosen by the customer via customizable options (see “Card Amount” below). Magento calculates it dynamically, so don’t hardcode it.
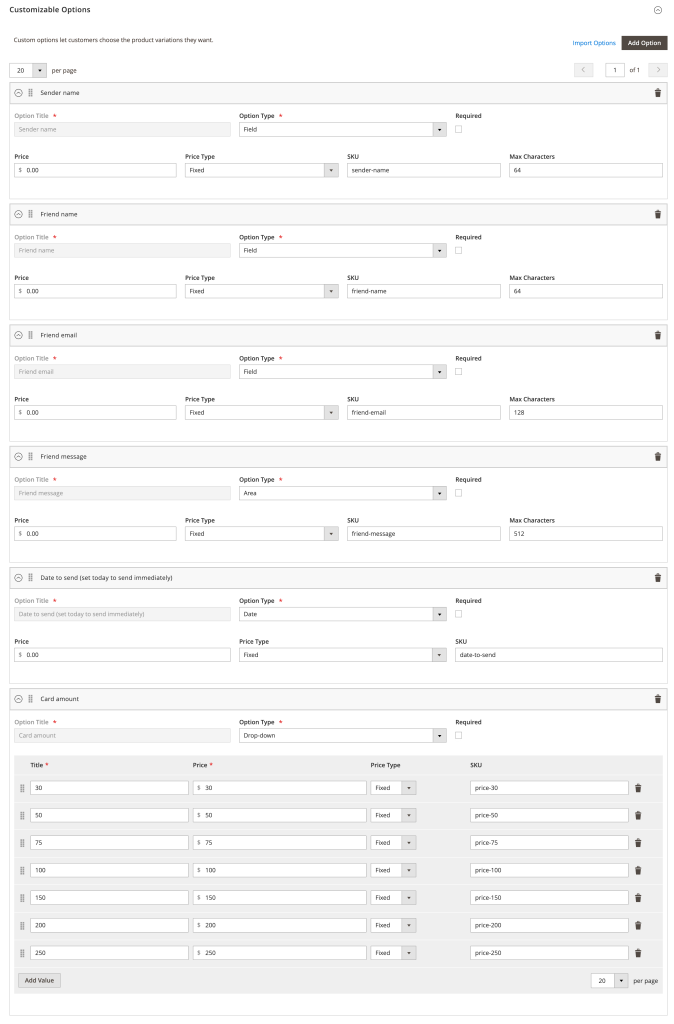
In the Customizable Options section, you’ll see some predefined fields. The key one is “Card Amount”, where you define the selectable values.
The rest (recipient name, email, message) are collected from the customer and used to send the gift card.
🛑 Don’t mess with the SKUs of the custom options. Magento holds grudges.
See custom options configuration screenshot in the next screenshot.
Once you create and configure your gift card, you should see something like this in the frontend.

💳 Applying a Gift Card (because spending it is the fun part)
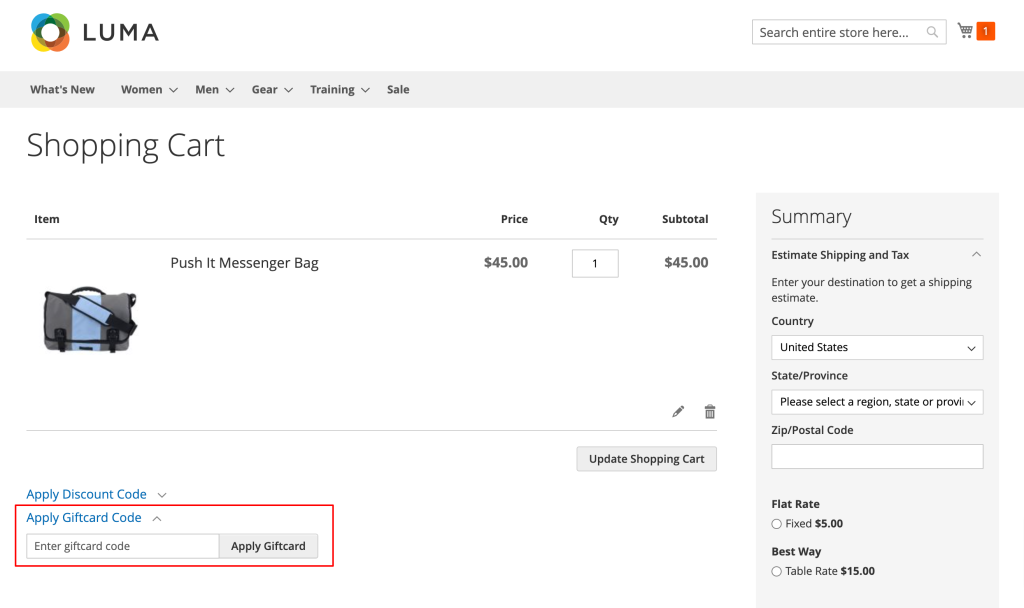
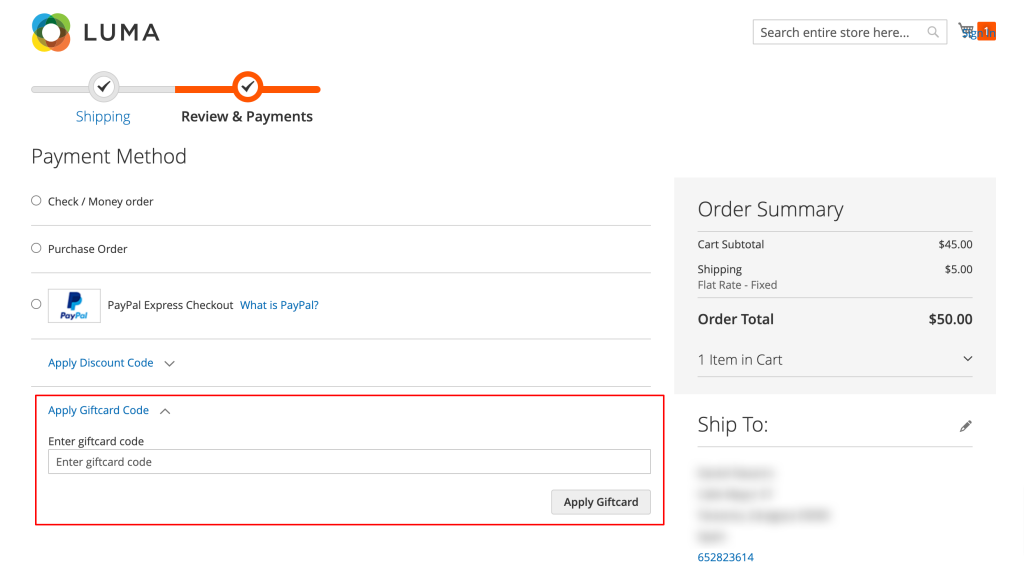
Customers can apply their gift card code in two places:
- 🛒 On the cart page (for the organized ones).
- 💳 On the checkout page, during payment (for the forgetful majority).
Enter the code, apply it, and done. No rituals, no hidden flags. Unless the code’s wrong or empty, then it’s support time 😅
🕵️♂️ Tracking Gift Cards in the Backoffice (a.k.a. the dark side of gifting)
Want to see all purchased cards, their balances and usage? Go to:
Marketing => Gift card list.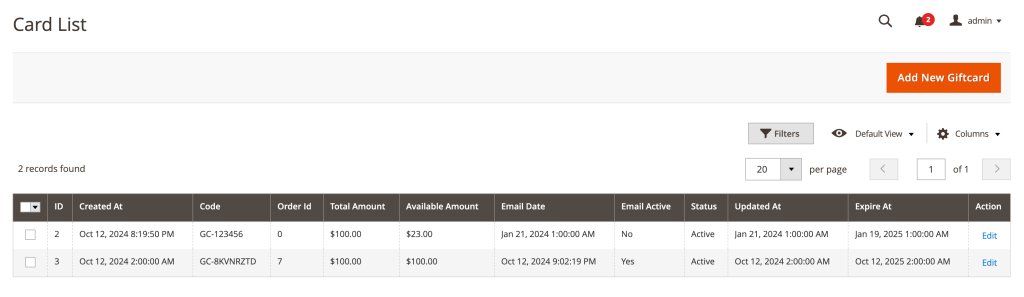
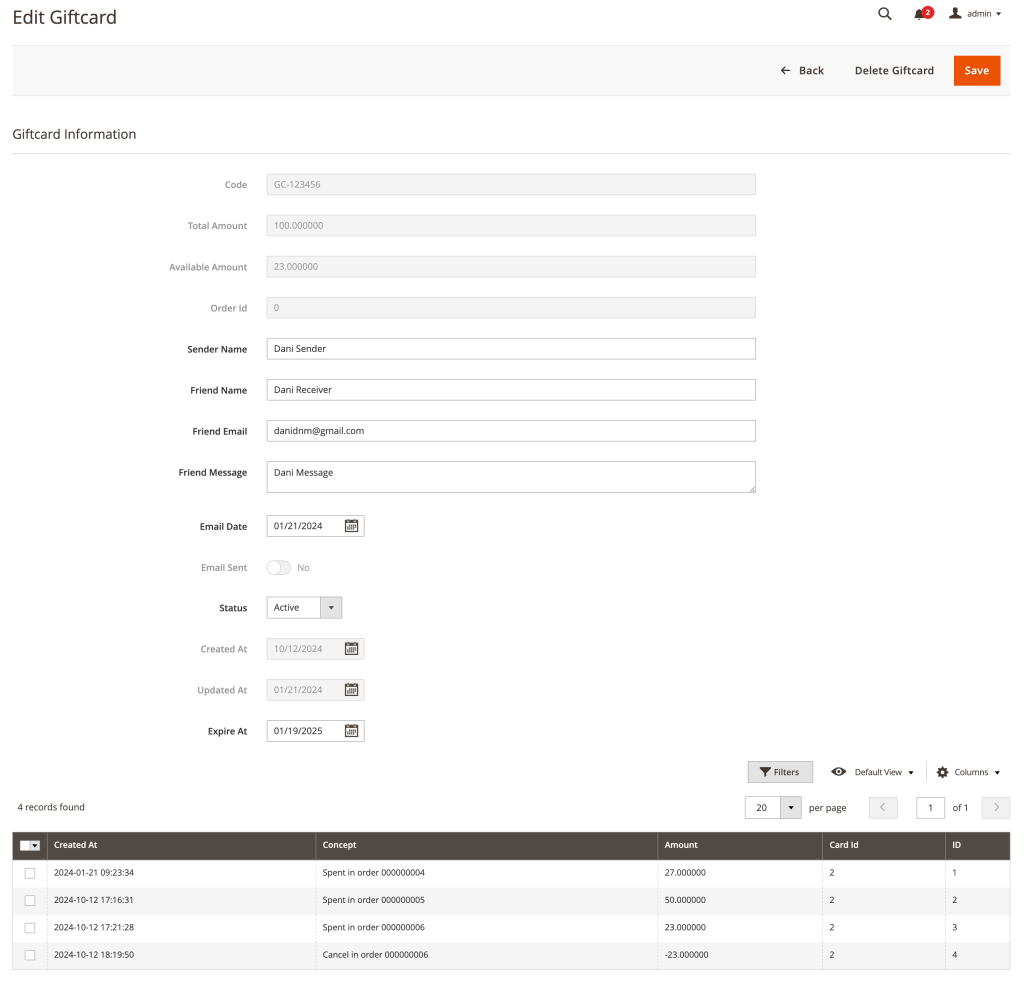
The list view shows the key data: status, balance, expiration, etc. Click “Edit” for more details.
On this screen, you can:
- 📊 View the full balance history.
- ✏️ Edit card details — though some fields (like amount) are locked to avoid messing with orders and totals.
- ✅ Enable or disable the card.
- 🗑️ Delete it (not recommended if it was purchased — disabling is safer).
- 🕒 Adjust email send date.
- 📆 Modify the expiration date, in case you want to give someone a second chance.
🔧 Creating Gift Card Codes Manually
Need to fix a mistake or give someone a card manually (angry customer, testing, holiday cheer)? You can do it straight from the backoffice.
Just hit “Create Gift Card” in the Gift Card List section.
License
If you fork, change, or share this extension:
- Keep it free and open under the GPL-3.0 license.
- Mention the original author in your
READMEorcomposer.json.
It’s polite. And we like polite devs.
😩 Having problems?
(No guarantees, but I’ll try to help — no server sacrifices required.)